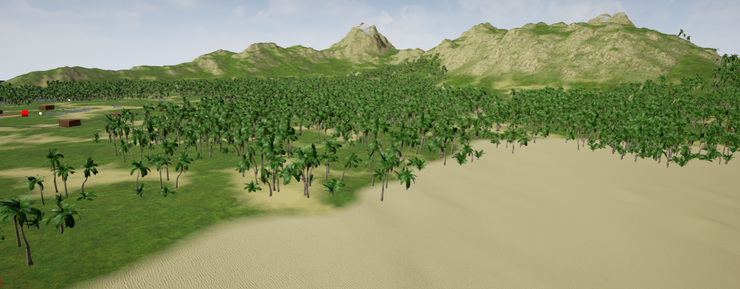
For the island used in Tropical Manipulation, I wanted a simple material applied that I could quickly tweak to get a great looking island. I investigated using landscape layers, but found that for what I was using it for (an unchanging backdrop to the game) they wouldn’t be necessary.
Here’s what I wanted from the material:
- Different areas based on height
- Beach - sand
- Flats - sand and grass
- Lower mountains - grass
- Upper mountains - snow
- Automatic rock textures on the side of cliffs
- A way to transition between areas
- A way to aesthetically combine sand and grass on the flats
- Colour manipulation
- Quick control and feedback over most variables without having to regenerate the material.
Luckily UE4 has a comprehensive material editor so I was able to achieve the above fairly easily. Don’t let the mass of nodes scare you off - it’s a lot of the same concept repeated and isn’t as complicated as it looks!
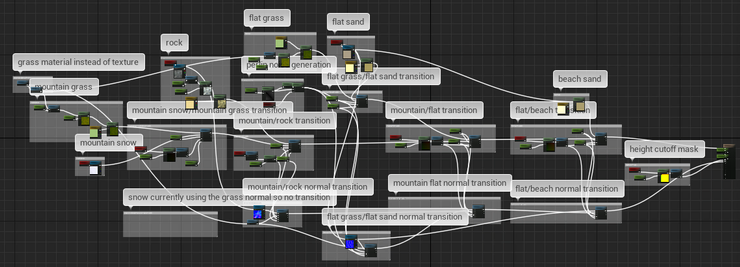
Lets start with how each texture is generated - snow, grass, rock and sand:
Textures
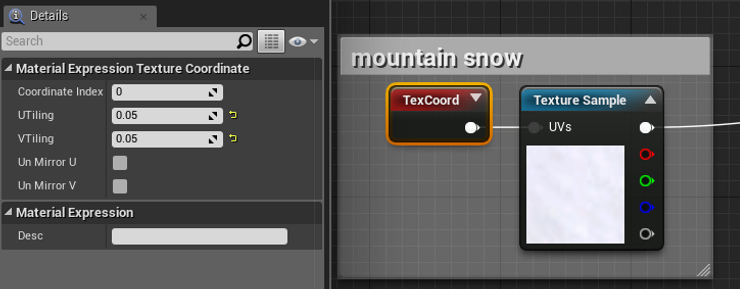
Snow
Snow is a simple texture sample, with some scaling applied via the TexCoord node to make it larger. Smaller values = larger textures.
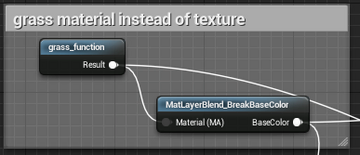
Grass
Originally I was using the grass texture from the starter content, but when looking at a lot if it you can see how it repeats. To get around that I copied the nodes from the starter content’s grass material instead, created a material function with them (same as a material but can be added to other materials) and added that material function to this material:
Then for the mountain grass I took the base colour output of this material and applied a few nodes that you’ll see applied in other places - contrast, darkness and colour controls. Each of these is a parameter and so can be changed and viewed instantly without recompiling the whole material.
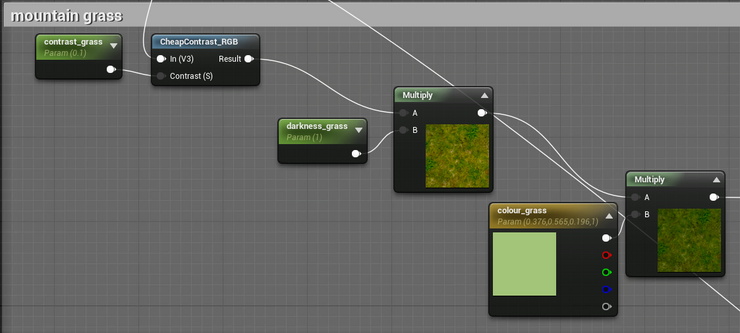
The contrast, darkness and colour controls are a key part of this material - theyre used to give each area the same overall tinge (golden, in this case) to make the entire material look cohesive. Without them everything seems out of place.
The flat grass section is an exact duplicate of this (right down to the values) but has separate parameter names so that I can edit it separately later.
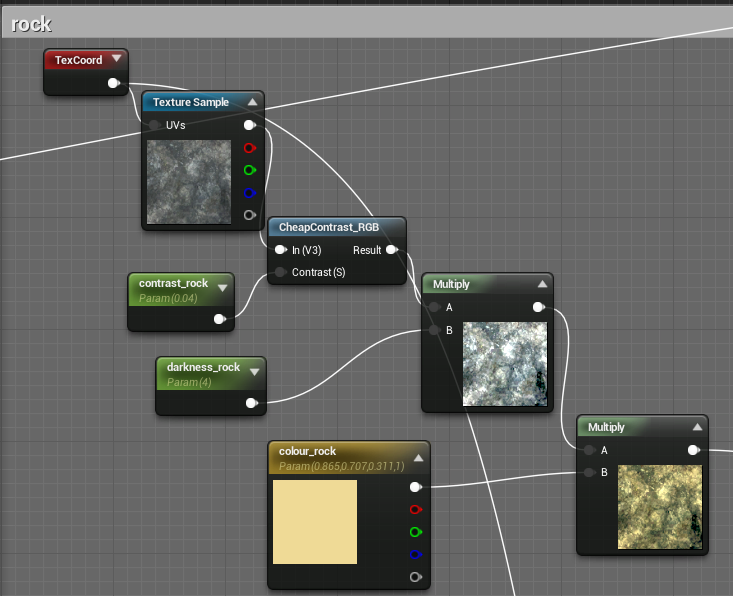
Rock
I could probably replace the rock here with a material function in the same way as the grass, but for now it looks fine. It grabs the texture sample, scales it, and applies contrast, darkness and colour controls.
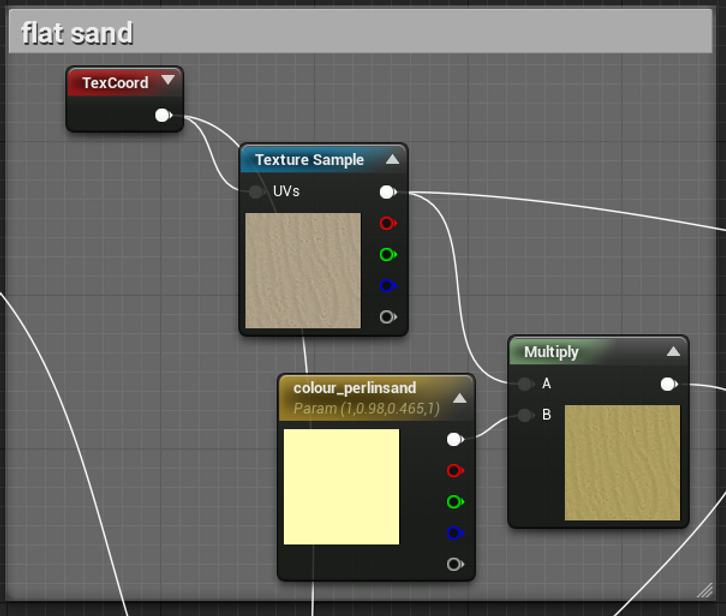
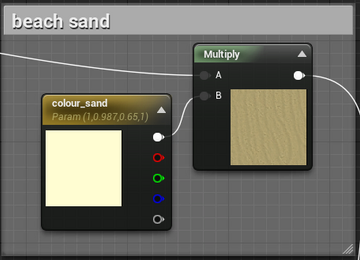
Sand
I haven’t found a need to apply darkness and contrast to the sand texture, so there’s only scaling and colour control in use here. The beach uses a lighter colour compared to the sand on the flats, but they both still have that golden grading.
Height Transitions
Each height transition (between snow/grass, grass/flats and flats/beach) uses the same method: Take the two inputs to blend, blend them at the input height, and take in two additional inputs to control the fade of the blend.
For this the blending is done with a HeightLerp node - this is like an advanced Lerp (linear interpolation) node but exposes some extra inputs for more control. It’s not restricted to use for height blends, I tend to use it most places I’d normally use a lerp node.
The height control comes from getting the absolute world position of the pixel and dividing it by the actual value where you want the transition to be.
Transition phase and contrast control how long the fade takes and how it looks. These values should be set to take input from parameters so that you can play around with their values and watch in real-time how things look.
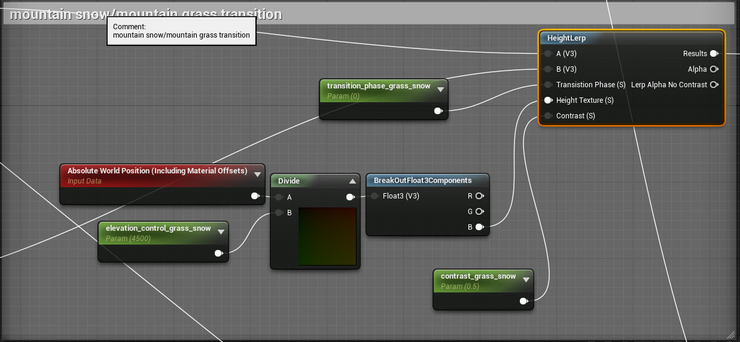
All other height blends are controlled the same way, but with different parameter names so that they can be adjusted individually.
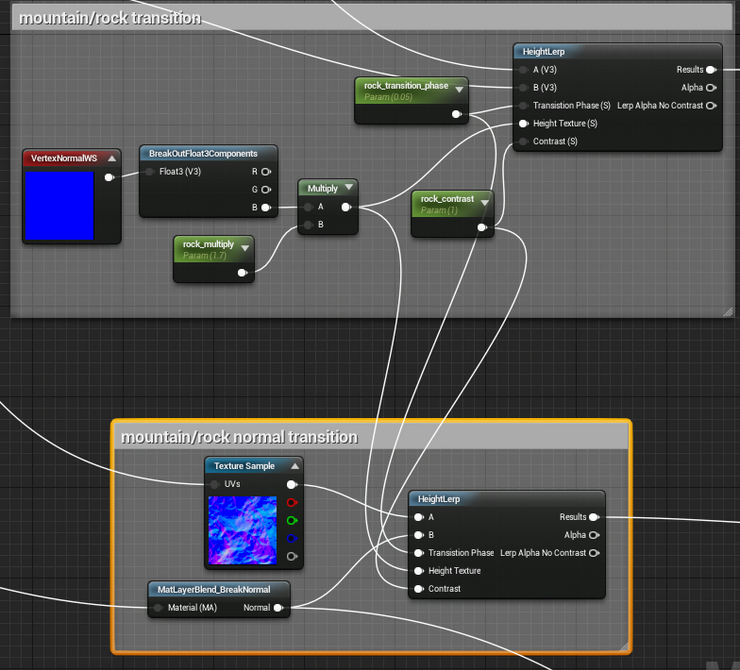
Angle Transitions (Rock)
This is where UE4’s materials really start to show their use. The basic idea of the rock transition is “Apply a rock texture to any area that has an angle greater than that specified.” This section uses the angle from vertical of each pixel, fades in a rock texture the further away from vertical it is. You’ll need to play around with the values to get it looking how you want, but these should give you a good start. Here is a good place to note that due to the fact that most material values are based between 0-1, tiiiiiiny changes in value (e.g. 0.005) create huge changes in the material.
The value of rock_multiply determines the angle at which the rock texture will take effect. At 1 it covers any angle, and higher numbers (up to around 4-5) decrease the the angle.
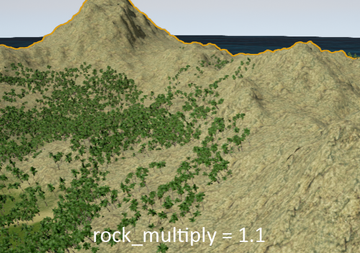
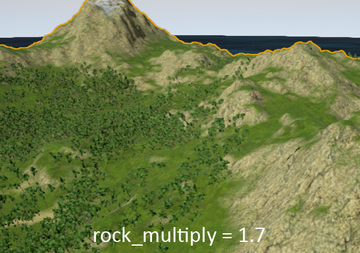
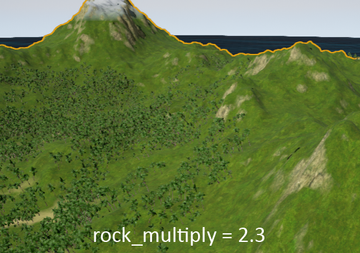
This section applies the rock texture only to the output of the snow/grass mountain output, so the rocks will only show in that area. Even fully vertical hills below this point will retain their original texture.
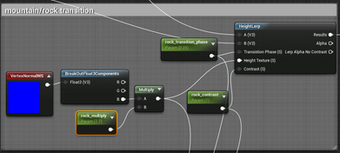
Again, transition_phase and contrast control the fade.
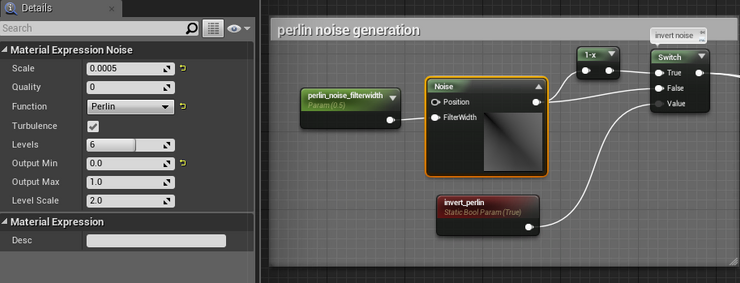
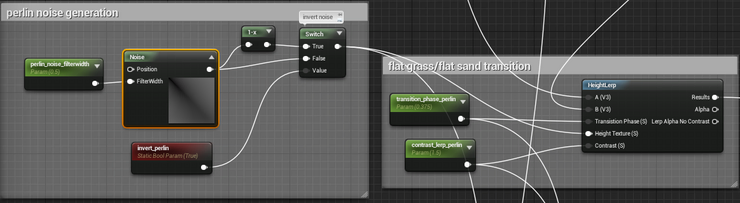
Random Noise Transitions (Flat grass/sand)
The random transitions between grass and sand in the flat area are acheived by piping the output of a perlin noise generator into a HeightLerp node instead of height data. The scale value on the perlin noise node needs to be tiny (0.0005) to get the scale right. Turbulence adds to the effect but can be disabled for a different look. Again, the transition phase and contrast are manipulated to get the fade between the grass and sand just right. Inversion through a 1-x node can be good to experiment with if you feel you have the shapes right but something still seems just a little off.
Normal Transitions
The transitions between normals are set up exactly the same as the transitions between textures except that they’re using normal textures instead, with the same values controlling both. The The same texture coordinates controlling scaling are also applied.
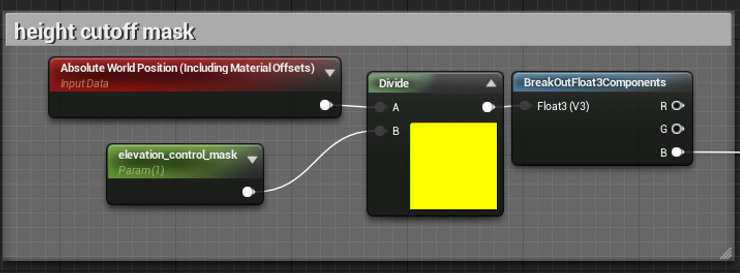
Height cutoff
When I generated the heightmap in World Machine and created a landscape with it, there was a large flat area below the beach, right up to the bounds of the landscape. This looked pretty bad when covered with water, so a height cutoff is created by masking any pixels below a world height of 1. The material’s blend mode is set to masked to allow this to happen.
Final Material
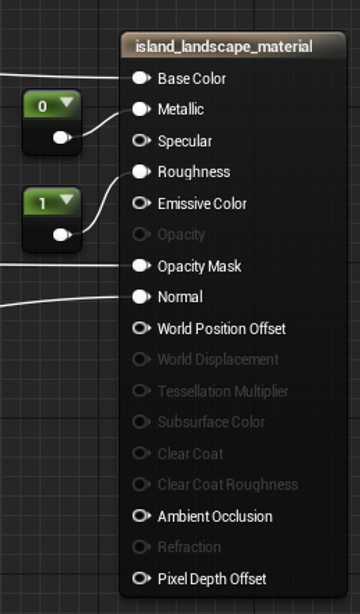
Send the texture blends to ‘Base Color’, set ‘Metallic’ to 0, set ‘Roughness’ to 1, send the height cutoff mask to ‘Opacity Mask’ and send the normal blends to ‘Normal.’
Play around with all the values to match the landscape you’re working with - the height values are all world height values, so these will definitely need to be adjusted.
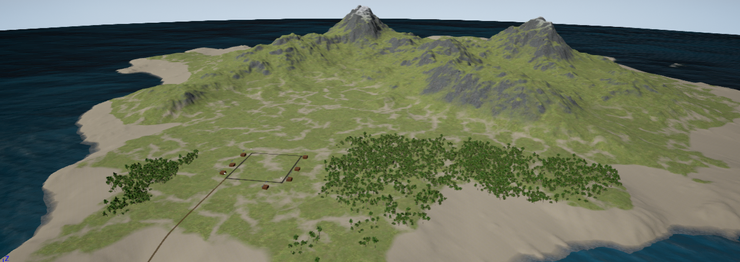
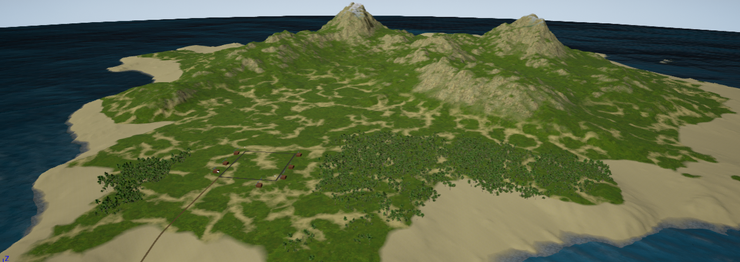
I have to point out again the importance of applying a colour scheme to your textures - without it they look really out of place, like this:
 .
.
Hit me up on twitter if you have any questions!
Full Blueprint browser: https://blueprintue.com/blueprint/9gx3zyla/
Videogames
Hey, do you like videogames? If so, please check out my game Inventor Simulator on Steam, and consider adding it to your wishlist. Craft inventions and sell them to customers, then automate your workbench, workshop and store! Research new inventions or create your own from scratch. Set prices based on an economic model, unlock and craft upgrades, and vertically integrate your supply chain. Become the world's greatest inventor!See full gameplay on Steam!